












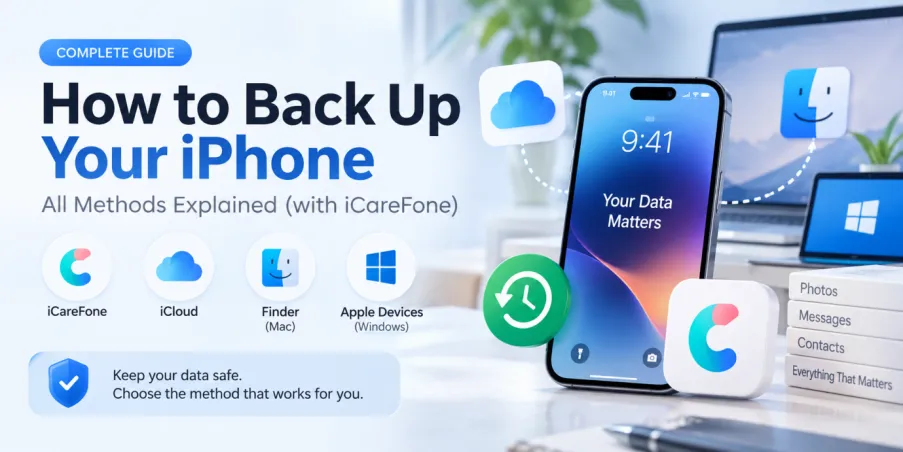

Creating a recent iPhone backup doesn’t require iTunes. If you’re wondering how to back up iPhone without iTunes on iOS 27, there are several practical options. You can save selected data to a computer with iCareFone, create a wireless backup through iCloud, or use Apple’s Finder or Apple Devices app for a local computer backup.
Each method works a little differently. The right choice depends on whether you prefer cloud or local storage, want automatic backups, or need more control over the data you save.
Part 1. Can I Back Up iPhone without iTunes on iOS 27?
Yes. iTunes is no longer the only way to back up iPhone data.
iCloud is Apple’s built-in wireless option. Once iCloud Backup is enabled, it can create backups without connecting the iPhone to a computer. Mac users can create local backups through Finder, while Windows users can use the Apple Devices app.
Tenorshare iCareFone offers another option for people who want more control over a local backup. According to Tenorshare, the current version supports iOS/iPadOS 27 and more than 20 types of data, including photos, videos, contacts, messages, music, notes, calendars, reminders, voice memos, and WhatsApp chats.
Here’s a quick comparison:
| Method | Backup Location | Backup Type | Automatic Backup | Access Individual Content |
| iCareFone | PC/Mac | Selective local backup | No | Yes, for supported data |
| iCloud | Cloud | Cloud device backup | Yes | Limited |
| Finder/Apple Devices | Mac/PC | Local device backup | No | Limited |
Part 2. How to Back Up iPhone without iTunes on iOS 27?
There isn’t one backup method that’s best for everyone. When deciding how to back up iPhone without iTunes, think about where you want your data stored, whether you need automatic backups, and whether you want to choose specific types of data rather than creating a standard device backup.
Method 1. Back Up iPhone Data to a Computer with iCareFone
Tenorshare iCareFone is an iOS backup and file-management tool for Windows and Mac. It provides a more flexible way to back up iPhone data because you can select supported categories before starting the backup.
Instead of relying entirely on cloud storage, the data can be kept locally on your computer. Tenorshare also allows supported backup content to be previewed and exported, which can be useful when you want easier access to particular files or data categories.
Here’s how to back up iPhone data using iCareFone:
- Connect your iPhone to the computer.
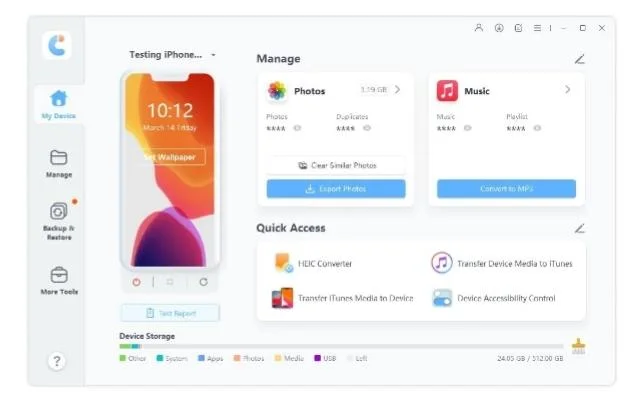
Install and launch iCareFone on your PC or Mac. Connect your iPhone using a suitable USB cable. Unlock the iPhone and tap Trust if the device asks whether you trust the computer.
- Open the backup feature.
Once iCareFone recognizes the device, open its backup section. The program will display the supported categories available for backup.
- Choose the data you want to save.
Select the categories you need, such as photos, contacts, messages, videos, notes, or other supported content. You can choose the data that matters instead of automatically including every available category.
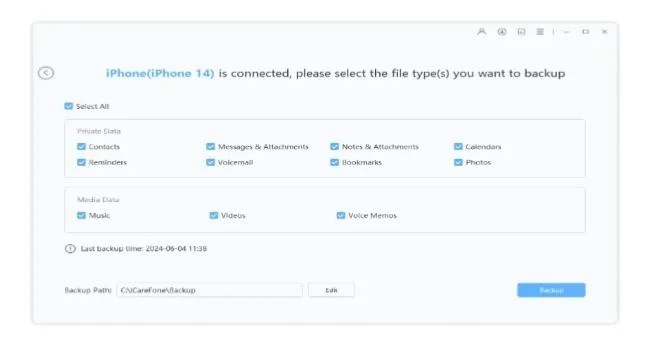
- Start and check the backup.
Start the backup and keep your iPhone connected while the process runs. Once it finishes, you can open the backup records and review supported content. Tenorshare also provides options to export supported backed-up data to a computer or external drive.
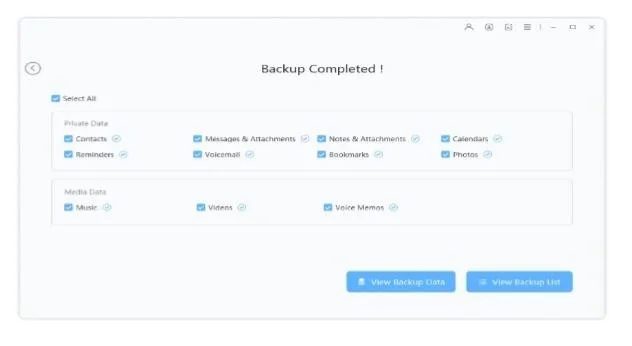
Limitation: iCareFone needs to be installed on a compatible PC or Mac, and the iPhone must be recognized by the software. A locked device that cannot be recognized by the program cannot be backed up this way.
Method 2. Back Up iPhone Wirelessly with iCloud
If you don’t want to connect your phone to a computer, iCloud provides the simplest built-in wireless option. Once configured, it can also back up the iPhone automatically.
- Open iCloud settings.
Connect your iPhone to Wi-Fi. Open Settings, tap your name, and select iCloud.
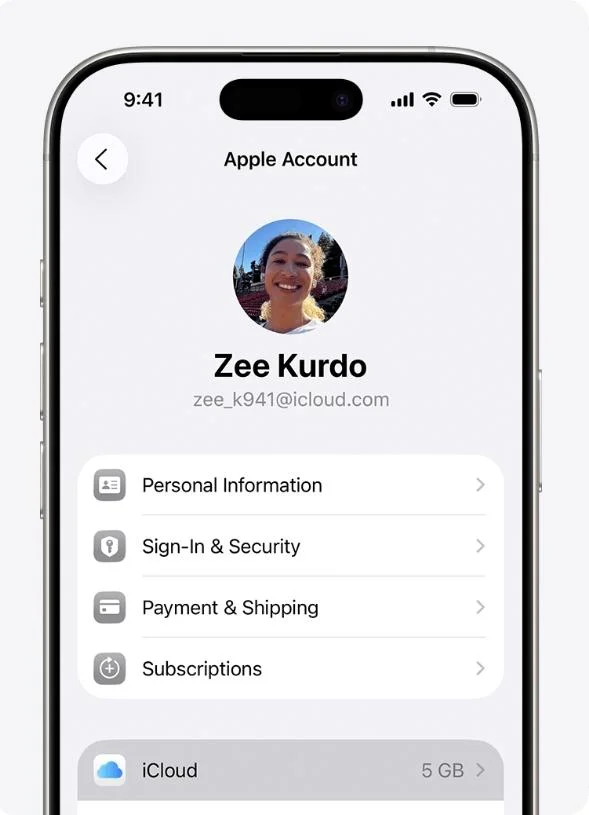
- Turn on iCloud Backup.
Tap iCloud Backup, then enable Back Up This iPhone if it isn’t already switched on.
- Create a backup.
Tap Back Up Now to start a manual backup. Keep the iPhone connected to Wi-Fi until the process finishes. You can check the date and time shown beneath the button to confirm when the latest backup was completed.
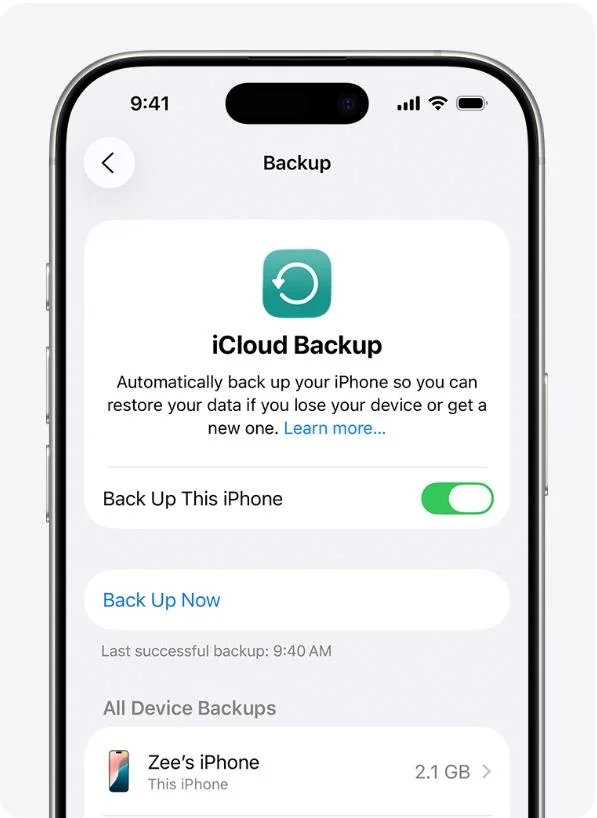
For automatic iCloud backups, keep iCloud Backup enabled. Apple states that automatic backups can occur when the device is connected to power and Wi-Fi with its screen locked.
Limitation: iCloud backups depend on available cloud storage and a network connection. If your account doesn’t have enough available storage for the backup, you’ll need to free up space or increase your iCloud storage.
Method 3. Back Up iPhone with Finder or Apple Devices
If you prefer Apple’s own local backup system, you don’t necessarily need iTunes. Current Macs use Finder for iPhone backups, while Windows users can use the Apple Devices app.
Option 1. Use Finder on a Mac
- Connect the iPhone.
Connect your iPhone to your Mac and open Finder. Select the iPhone under Locations in the Finder sidebar. Complete the Trust prompts if they appear.
- Configure the backup.
Open the General tab and choose the appropriate local backup option. You can also select Encrypt local backup if you need an encrypted copy.
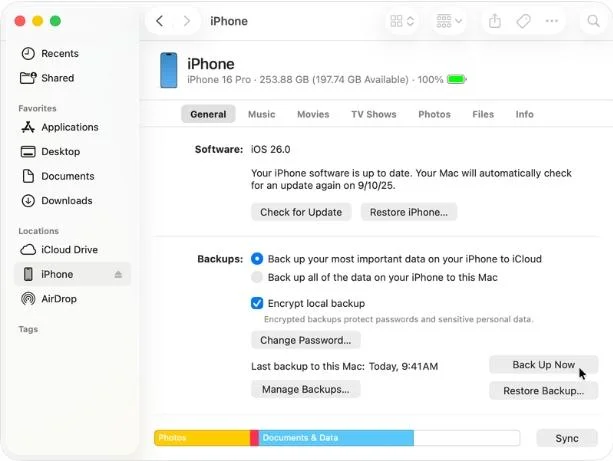
Encryption is important if you want certain sensitive information, including Health and Activity data, included in the computer backup. Make sure you keep the encryption password somewhere safe.
- Start the backup.
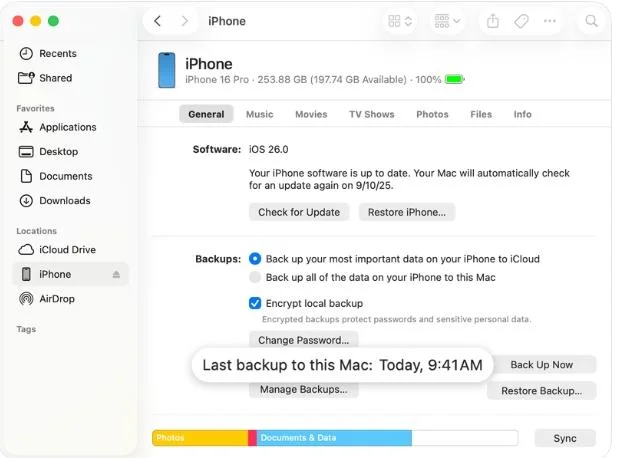
Click Back Up Now and leave the iPhone connected until the process finishes. Check the latest backup information afterward to confirm that the backup was successfully created.
Option 2. Use Apple Devices on Windows
- Connect the iPhone to your PC.
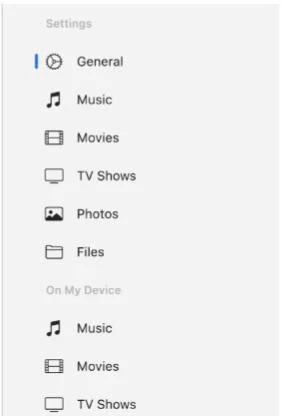
Open the Apple Devices app and connect your iPhone. Select the device from the sidebar and complete any Trust prompt that appears.

- Choose your backup settings.
Open General and select the appropriate backup options. If you choose an encrypted local backup, create a password that you can safely retain.
- Select Back Up Now.
Click Back Up Now and wait for the process to complete. Check the latest backup information afterward to make sure the backup finished successfully.
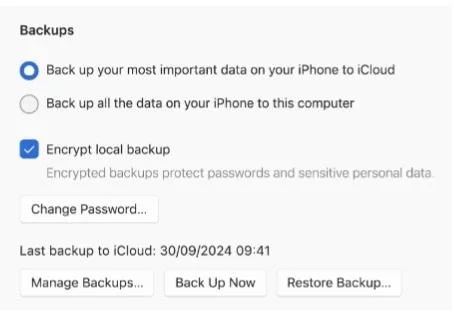
Limitation: Finder and Apple Devices require a compatible computer with enough available storage. Apple’s local backups are mainly intended for device backup and restoration, rather than browsing the backup as a normal folder containing individually accessible files.
Part 3. How to Check and Protect Your iPhone Backup
Creating a backup is only useful if you can rely on it when you actually need it. After making an iCloud backup, check the date and time displayed beneath Back Up Now. For Finder or Apple Devices, verify the latest backup information after the process finishes.
If you use an encrypted computer backup, protect the password carefully. Apple cannot simply recover a forgotten encrypted-backup password for you, so losing it can prevent you from using that backup when you need it.
It’s also worth checking important apps separately when you back up iPhone data. Some messaging and authenticator apps have their own synchronization, transfer, export, or recovery procedures. Don’t assume that creating one device backup automatically covers every account or service exactly as you expect.
This is particularly important before selling, resetting, replacing, or erasing your old iPhone. Confirm that your most important information is safely stored before removing anything from the original device.
FAQs about Backing Up iPhone without iTunes
1. Can I Back Up My iPhone to a PC without iTunes?
Yes. Windows users can use Apple’s Apple Devices app to create a local iPhone backup without iTunes. Connect the iPhone, select it in Apple Devices, open General, choose the appropriate backup settings, and select Back Up Now.
You can also use a third-party tool such as iCareFone if you want selective backup and easier access to supported backup content.
2. Can I Back Up iPhone without iCloud or a Computer?
For a complete device backup, Apple’s main choices are iCloud or a computer. If you don’t have a computer, iCloud is the most straightforward built-in option.
You can upload individual photos, documents, and other files to separate online services, but saving individual files isn’t the same as creating a complete iPhone backup.
3. Does iPhone Backup Include Photos and Messages?
It depends on how your information is stored and synchronized. Some data may already be synced separately through iCloud rather than being included in the device backup in the way you might expect.
Before deleting anything from your iPhone, check your iCloud synchronization and backup settings for important content such as photos and messages.
4. How Long Does It Take to Back Up iPhone?
There isn’t a fixed backup time. It depends on how much data needs to be copied, whether it’s the first backup, the method you’re using, your internet connection for iCloud, and the computer connection for local backups.
Keep the iPhone connected as required and wait until your chosen method confirms that the backup has finished.
5. Can I View Individual Files in iPhone Backup?
Standard Finder and Apple Devices backups aren’t designed to work like ordinary folders where you simply open and browse individual files.
iCareFone takes a different approach. Tenorshare says users can preview supported backup content and export supported data to a computer or external drive. This can make it more practical when accessing particular backed-up content is important.
Conclusion
Choosing how to back up iPhone without iTunes depends on what you want from your backup.
iCloud is a convenient choice if you prefer automatic wireless backups and don’t mind storing the backup in the cloud. Finder and Apple Devices are better suited to people who want Apple’s own local computer-backup system.
If you want to choose specific types of data and have more control over supported locally backed-up content, iCareFone provides a more flexible alternative.
Whichever method you choose, don’t wait until your iPhone is lost, damaged, or needs to be reset. Create a recent backup now and verify that it completed successfully so your important data is there when you need it.
Like our Facebook Page here at NasiLemakTech.com for more news and in-depth reviews! Also, join our Facebook Group for insightful information and memes!
Subscribe to our YouTube channel too!