













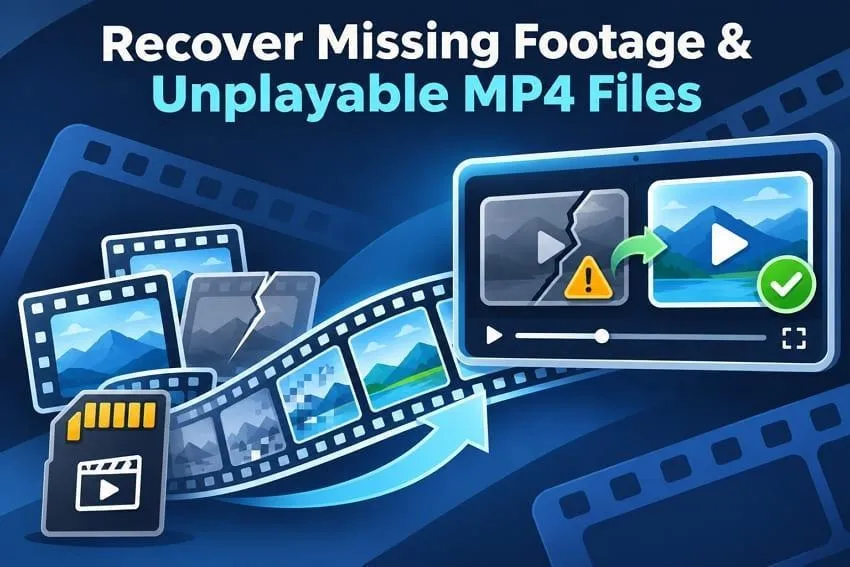

After a shoot, you might find that a clip has vanished from a camera card, or that an MP4 copied to your computer no longer plays. These problems call for different next steps: a missing clip may need recovery from the original storage, while a damaged file that still exists may need repair after basic playback checks. This guide uses Recoverit’s video recovery software to explain the options. Stop recording to the affected card or drive, and keep an untouched copy of any damaged file before experimenting.
Identify What Happened to the Footage
First, check whether the footage is actually missing or simply unplayable. A deleted camera-card clip, a transfer that did not finish, and a video that fails in one player can look similar but require different actions. Use this quick decision guide before running a scan or repair:
| What You See | Possible Cause | What to Do |
| Missing Video | Accidental deletion, formatting, or a card error | Check a copy first; scan the original card or drive only if it is readable and stable |
| Incomplete Video | File transfer stopped before completion | Re-copy from the intact original if available; do not repair the incomplete transfer first |
| Video Won’t Play | Unsupported codec, player issue, or file damage | Try another compatible player or codec; repair a duplicate only if the file is damaged |
Before trying recovery or repair, check whether an intact copy is already available. These four quick checks may save unnecessary scanning:
- Other Copies: Check the second card in a dual-slot camera, your phone’s “Recently Deleted” album or Trash, cloud storage, and older folders on your computer.
- Camera Playback: Try playing the video on the camera that recorded it. If the original plays correctly, the transferred copy or computer’s playback support could be the problem. Try another player before attempting repair.
- Split Recordings: Some cameras split a long shoot into several consecutive files. Check for the next numbered clip before assuming part of the recording is missing.
- Codec Support: A playable HEVC (H.265) video may fail in an app without the right decoder. Try an up-to-date compatible player, such as VLC, before calling the file corrupted.
If the original recording is missing, avoid writes to that source and check for a usable backup before scanning. If a transfer produced a short or incomplete copy, transfer the intact original again to healthy storage. If the video exists but does not play, rule out codec and player problems before testing file repair on a duplicate. Do not format the camera card or run filesystem repair just to make a clip visible.
Recover Clips Missing from the Original Card or Drive
If no good copy exists and the original card or drive is stably readable, a scan may locate deleted footage before new data overwrites it. Recoverit’s video recovery guide covers device selection, scanning, previewing and export. Protect the original source: do not record new clips, initialize the card or accept automatic repair prompts.
Recoverit can scan supported cameras cards and drives, show recoverable video candidates, and save selected clips elsewhere. The screenshots below illustrate product controls, not a hands-on recovery test performed for this article.
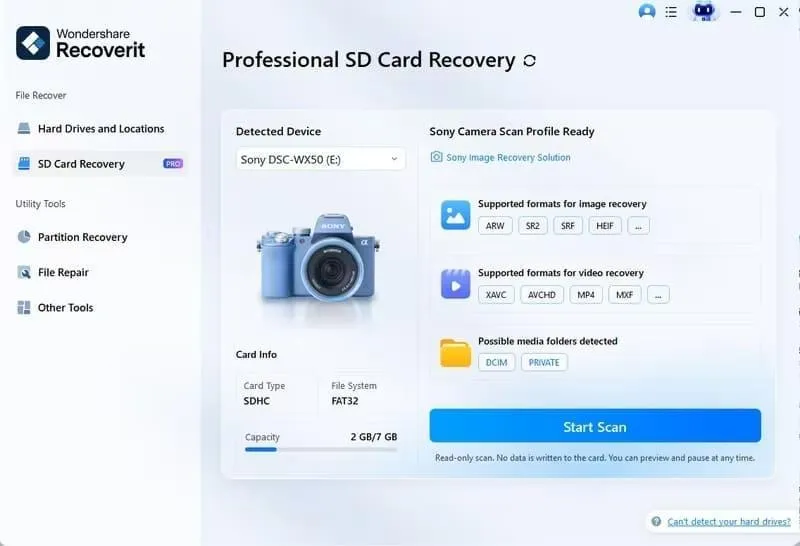
Step 1. Select the Original Card or Drive
Connect the original camera card through a compatible reader, or attach the affected drive to a stable computer. In Recoverit, choose SD Card Recovery for supported camera cards or Hard Drives and Locations for other readable storage. Confirm the device name and capacity before starting. The example below shows a recognized Sony camera card, not a test of this article’s footage.
Step 2. Scan the Drive and Find Missing Videos
Once you select the correct source, start the scan. Browse the results and use available file-type filters to locate MP4, MOV or other expected video formats. Allow a stable scan to finish, but stop if the source repeatedly disconnects or reports serious read errors. The interface example below shows scan results on a USB drive, not on a card tested for this article.
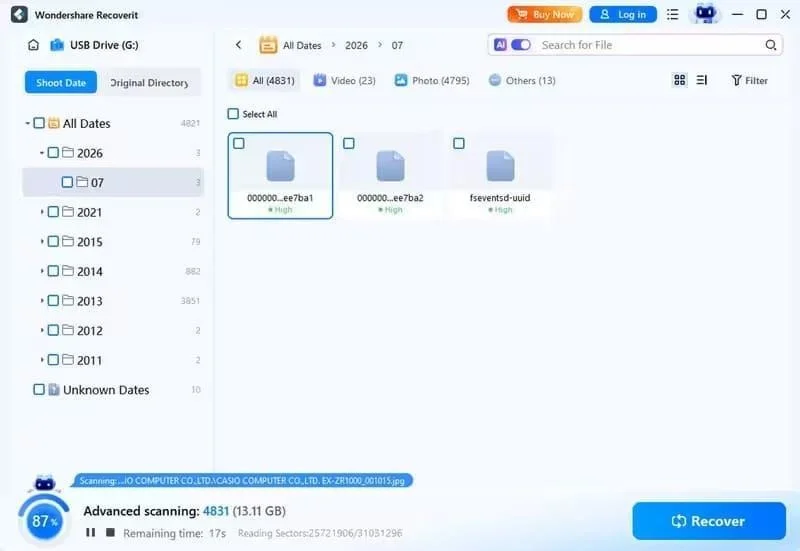
Step 3. Preview and Recover the Videos
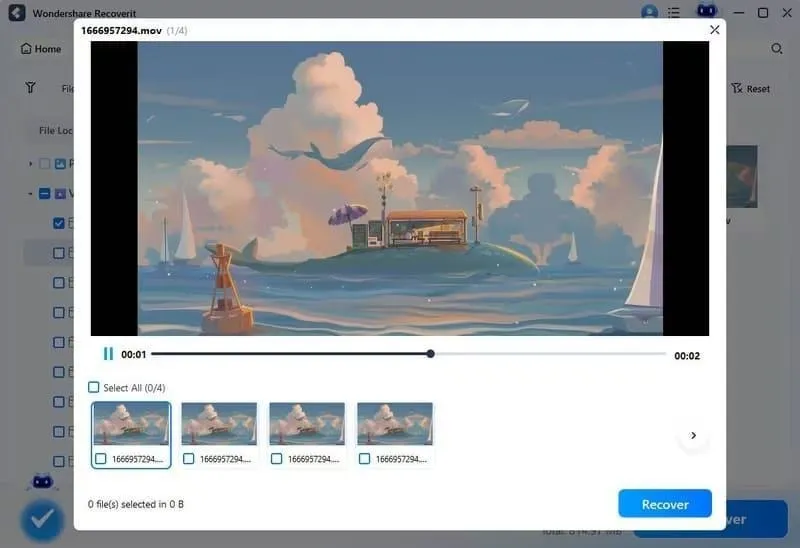
Preview supported clips when available, paying attention to picture, sound and more than the opening frames. A filename or thumbnail does not prove that an entire recording is intact. Select the files you need and click Recover, then save them to another healthy disk rather than the source card or drive. Preview and export availability can vary by file type and license.
When to Use Enhanced Recovery for Videos
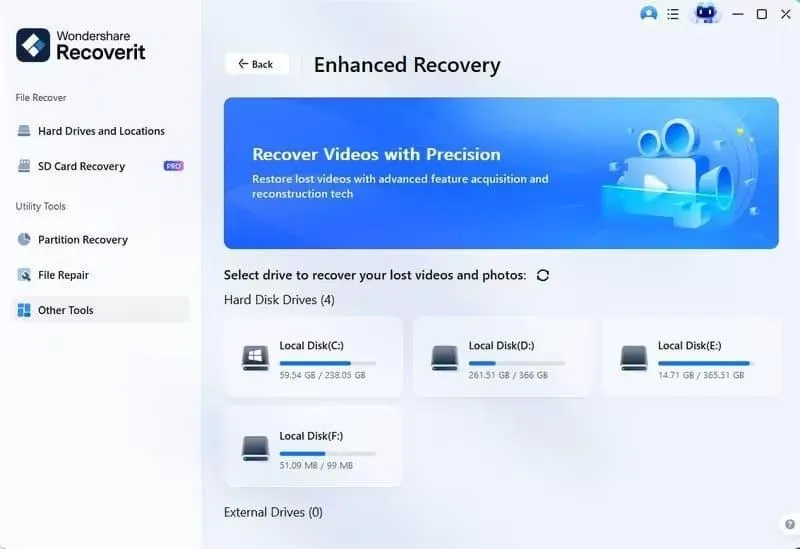
Large camera videos can be stored in fragments. If a normal recovery produces an incomplete clip, Enhanced Recovery may help on supported, still-readable media where relevant video fragments remain. It attempts to match those fragments; it cannot reconstruct frames that have been overwritten or lost with inaccessible hardware.
In the current Recoverit interface, open Enhanced Recovery, select the correct source and relevant video formats, and scan if the original storage is stable. Preview supported results, save candidates to a different healthy drive and check playback afterward. The screenshot below shows the Enhanced Recovery selection panel with no removable drive connected; it is a feature-navigation example, not evidence of a completed scan.
Repair an Existing MP4 That Will Not Play
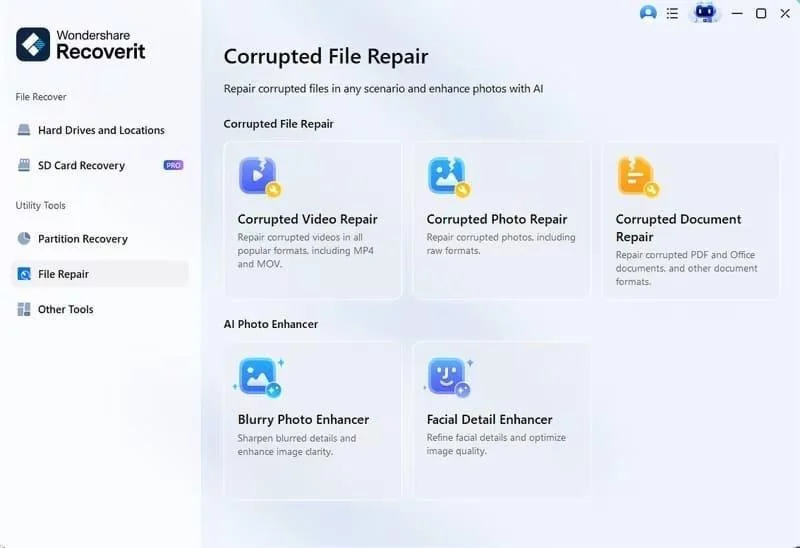
Sometimes the MP4 still exists but will not open because recording or transfer was interrupted, leaving its container or other file structures damaged. First check whether the same video plays in the camera or a compatible player. If an existing copy contains video data but is damaged, Recoverit includes a File Repair workflow that is distinct from recovering deleted clips.
Preserve the damaged MP4, then create a working duplicate on healthy storage. File Repair supports adding several files where the current edition allows it. The steps below describe the current general workflow; interface labels can vary by version.
Step 1. In Recoverit, open File Repair and choose Corrupted Video Repair. Click Add or Add Files and choose the working copy of the MP4. Do not alter the original recording or the only damaged copy.
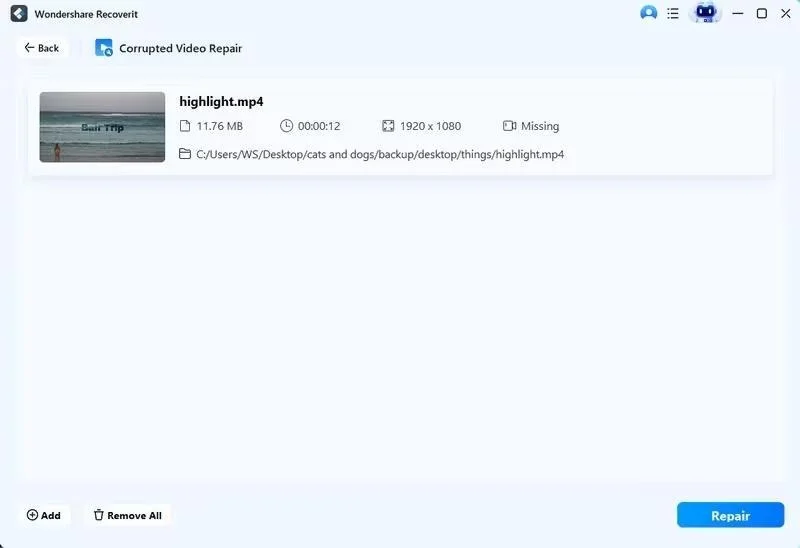
Step 2. Review the selected file and click Repair. When a result is available, use Preview to inspect it rather than assuming the process succeeded. An unavailable metadata field in a screenshot does not, by itself, establish that the original video is playable or permanently lost.
Step 3. If the preview is promising, click Save and choose a different healthy location. Play the exported MP4 outside Recoverit to check the actual output; do not replace the damaged original until you have a verified, backed-up copy.
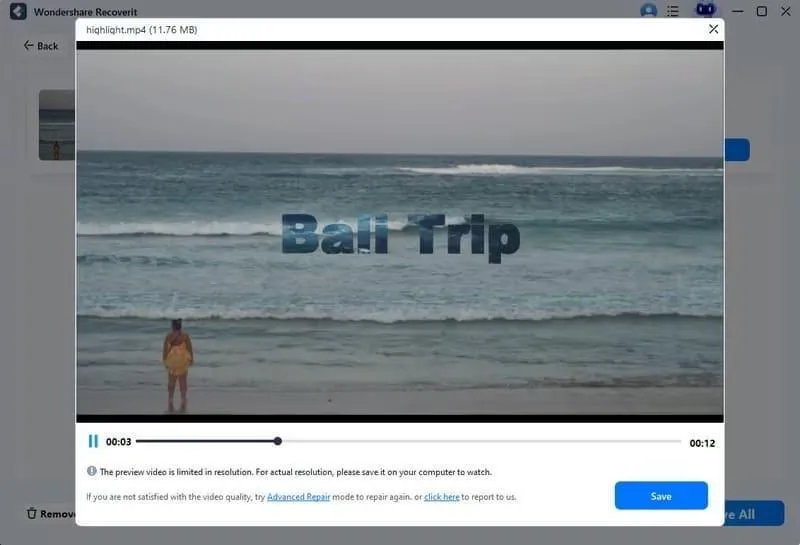
If ordinary Repair does not produce a usable file, Advanced Repair may use a working sample video of the same format, preferably recorded on the same camera with similar settings. Do not record that sample on the affected card. Recoverit’s MP4 repair guide explains why a suitable reference matters; confirm which advanced features are included in your Recoverit edition before relying on them.
File repair can sometimes rebuild usable structure from data that remains in a damaged file; it cannot create footage that was never captured, restore overwritten frames or repair a zero-byte file with no video payload. Some previews and saving options require an eligible license.
Check the Footage Before Returning to the Edit
Whether you recovered a missing clip or repaired an MP4, verify the exported file before bringing it back into an editing project. A scan match, repair message or short preview is not enough. Check these details on the saved copy:
- Video Duration: Compare the reported length, frame rate and codec with your camera settings or an intact companion clip, if those details are known. MediaInfo can help read the technical metadata.
- Playback: Watch the start, middle and final portion. Seek to several points and look for freezes, black or green blocks, repeated frames and missing segments.
- Audio Sync: Listen at several points and check whether voices, movement and sound stay aligned throughout the clip.
- Editing Test: Import the verified clip into the intended editor, scrub the timeline and try a short export to check compatibility. MOV, MP4 and MXF are containers; their internal codecs still matter to the editing software.
Keep the original storage unchanged until the exported footage has been checked and backed up in a separate location. If the card or drive shows physical failure or repeated disconnects, stop repeated scanning and consider a qualified data-recovery specialist. A safe return to editing means you have usable, verified clips—not merely filenames in a scan or a successful repair notification.
Like our Facebook Page here at NasiLemakTech.com for more news and in-depth reviews! Also, join our Facebook Group for insightful information and memes!
Subscribe to our YouTube channel too!